Tools and Integrations
By default, your agent answers questions from your knowledge base. Tools let it do things too - look up an order, check a shipment, create a ticket, or call your own systems. You choose exactly which tools your agent can use on the Tools tab of the agent configuration page.
How Tools Work
When your agent is in a conversation, it decides - based on the visitor's question - whether a tool would help. If you have enabled a "look up order" tool, the agent can call it, read the result, and use it in its answer. You stay in control of which tools exist and what they are allowed to do.
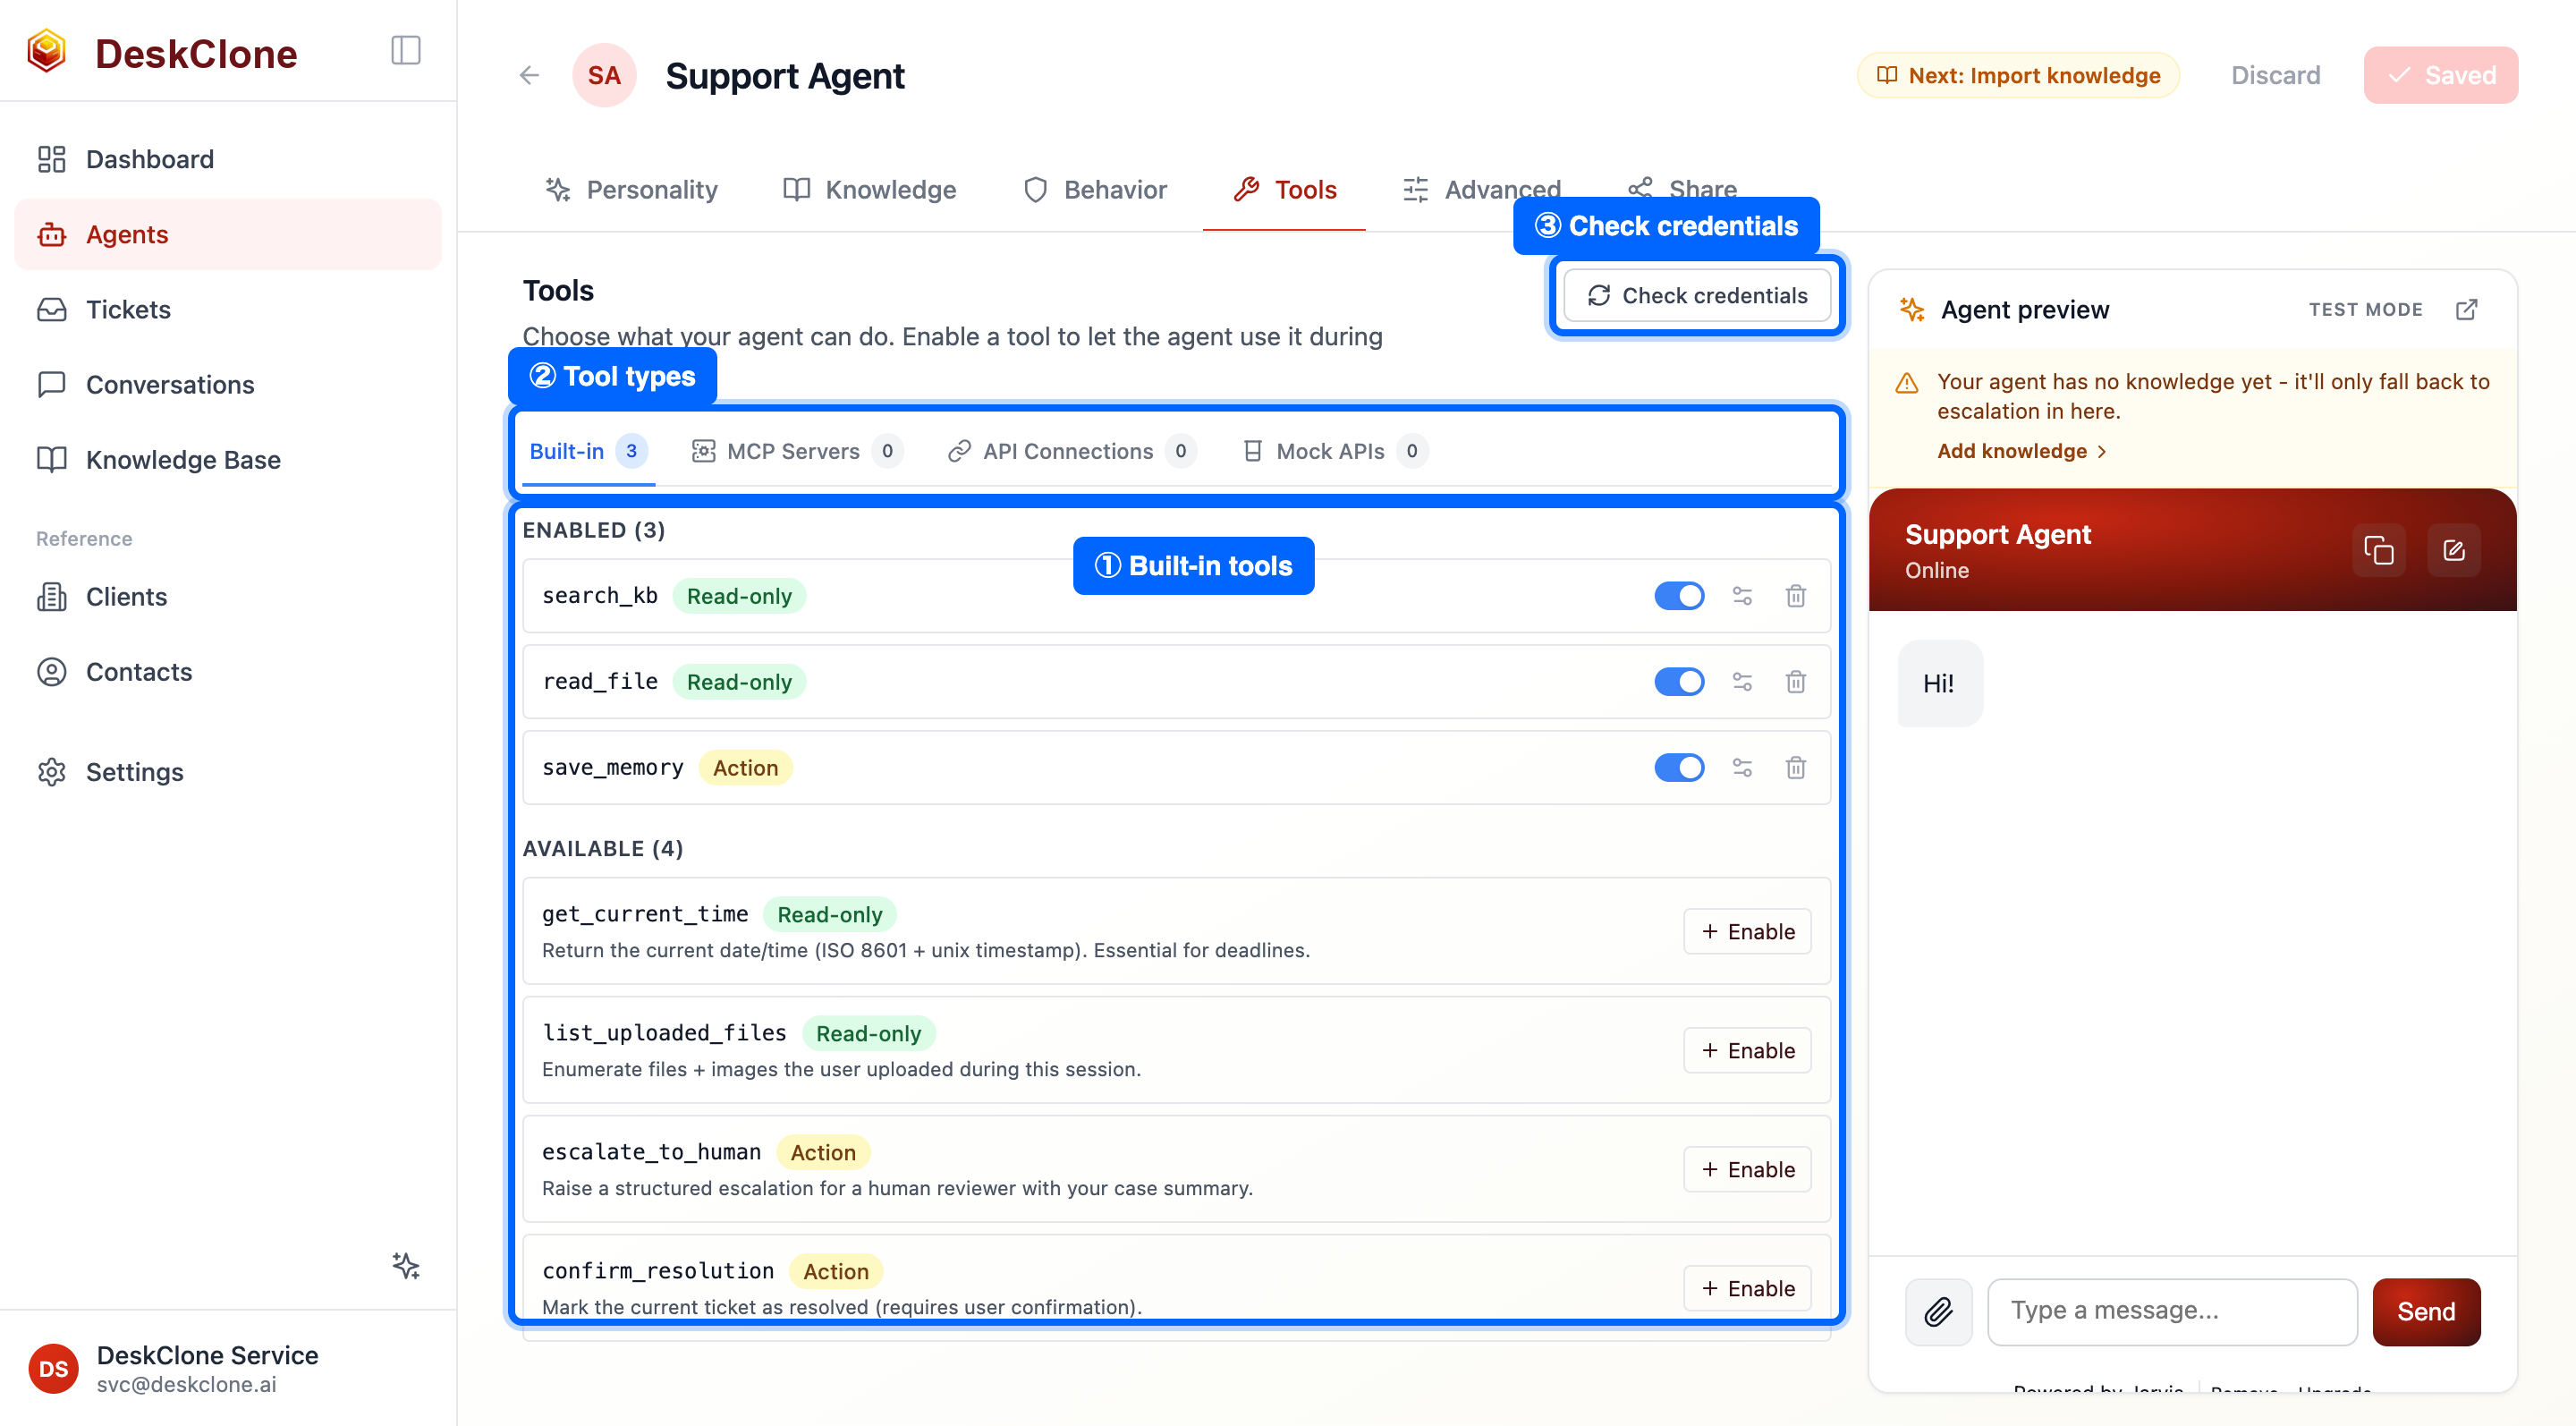
The agent Tools tab showing the built-in tool catalog, the buttons to add custom API tools and presets, and the MCP servers section
Built-in Tools
DeskClone ships a catalog of safe, ready-to-use tools you can switch on with a single toggle. Common ones include:
- Search knowledge base - find relevant content to answer a question
- Read a file - open a specific knowledge base file
- Save a memory - remember a detail for later in the conversation
- Get the current time - useful for deadlines and "how long ago" questions
- List uploaded files - see the files and images a visitor attached in the chat
- Confirm resolution - mark a question as resolved
- Escalate to a human - hand off when the agent cannot resolve the request
Each tool shows its risk as a badge - Read-only tools change nothing; Action tools take an action. You enable a tool with its toggle.
New agents start with a sensible default set, so they can answer from your knowledge base immediately.
Custom API Tools
Custom API tools connect your agent to your own systems. Point the agent at any HTTP endpoint and it can call it during a conversation.
Open the API Connections sub-tab
Go to Agents, click your agent card, open the Tools tab, and select the API Connections sub-tab.
Add a new API tool
In API Connections, add a new API tool. Give it a clear name and description - the description tells the agent when to use it.
Configure the request
Set the method (GET, POST, PUT, PATCH, or DELETE), the URL, and any path, query, or body parameters the agent should fill in.
Add authentication
Choose how the tool authenticates: bearer token, header key, basic username and password, or OAuth. Credentials are stored encrypted.
Test it
Use the Test button to send a sample request and confirm the connection works before going live.
Write the tool's description for the agent, not for yourself. "Look up the status of an order by its order number" tells the agent exactly when to reach for it. A vague description leads to the tool being used at the wrong time, or not at all.
Connection Presets
If you use a popular service, you do not have to wire it up by hand. Connection presets set up the right tools for you in a couple of clicks. Presets are available for:
- Zendesk - create and update tickets
- Shopify - look up orders and customers
- Stripe - check payments and issue refunds
- PayPal - check transactions
- Slack - post messages
- GitHub - read and create issues
- Notion - read pages
- Calendly - check availability and bookings
Open API Connections
On the Tools tab, open the API Connections sub-tab.
Pick a service
Choose a connection preset for the service you want (for example, Shopify).
Connect your account
Enter the credentials the service asks for (an API key, token, or OAuth login). The relevant tools are added to your agent automatically.
MCP Servers
If you run a Model Context Protocol (MCP) server, you can connect it to expose its tools to your agent. From the Tools tab, open the MCP Servers sub-tab, add your server's URL and credentials, and DeskClone will list the tools it provides so you can enable the ones you want.
A Mock APIs sub-tab is on the way. It will let you give a tool canned responses for testing, so you can try a tool's behavior before the real API is ready.
Risk Levels and Visibility
Every tool has a risk level, and DeskClone uses it to keep your public widget safe:
- Read-only - looks something up, changes nothing. Example: check an order status.
- Mutating - changes data. Example: update a ticket.
- Destructive - removes or irreversibly changes data. Example: issue a refund.
Customer-facing widget conversations only ever see read-only tools. Your agent literally cannot call a mutating or destructive tool from a public chat - it is not offered those tools at all. Mutating and destructive tools are available only in employee-assisted ticket work, where the approval workflow adds another check on top.
Guardrails
For any tool that moves money or changes customer data, set guardrails. A guardrail (for example, a maximum refund amount, or a required field) is enforced before the request is sent - so a cleverly worded message cannot talk your agent into exceeding it. When a guardrail blocks an action, the agent is told why and can escalate to a human instead of retrying.
Always set guardrails on financial and data-changing tools. Risk gating keeps these tools out of public chats, and guardrails cap what they can do even in employee-assisted work. Together they are your safety net.
Checking Tool Health
Once you have connected custom tools and presets, click Check credentials on the Tools tab to confirm each one's credentials still work. The check tells you which tools are healthy and which need attention (for example, an expired API key), so a broken integration does not surface as a failed answer to a customer.
What's Next
Your agent now has the knowledge and the actions it needs. Time to put it in front of visitors - head to Embed Widget to generate and install the chat widget.
Was this page helpful?